
Tuesday, December 16, 2014
Finished Website!
Final House Animation

 The scope of this project was to create a dream home using Google Sketch Up. The home had to include a roof and other details on it. The process to complete this project was to get familiar with the program by creating a chair first then to start creating a house. Along the way, I learned how to use Sketch Up and that animation wasn't just movies but also things like houses. I also learned how to ask others for help of I was unsure of how to make a certain aspect of the house. If i did this project again I would go back and fix my driveway and grass to make sure they were closer together. The driveway distracts from the house. I would keep the front of my house the same because that is my favorite part of the house and shows my style. This project will help me in the future to take more time on the smaller details. I enjoyed this project after I learned how to use the program.
Monday, November 17, 2014
Finished Animation
Friday, November 7, 2014
Rainy Day Animation

Thursday, October 9, 2014
Photoshop Projects
 |
| Project One |
 |
| Project Two |
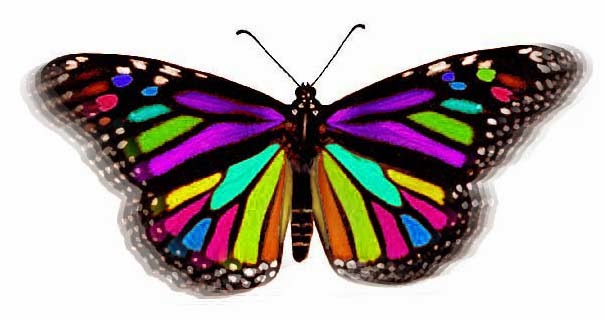
For the butterfly project the goal was to create a bright and symmetric butterfly that had the effect of fluttering it's wings. In order to make the flying effect we used the clone tool and moved it down the sides of the wings a couple times. When changing the colors of the wings we changed the hue and saturation slider. At first my biggest challenge was using the clone tool but after getting the hang of it, it was easier. I would change a couple of the colors on the wings if I ever did this project again.
 |
| Project Three |
 |
| Project Four |
Friday, September 26, 2014
My Name Logo
In this project we were assigned to create a logo that resembled our personalities. We started by learning about the meaning of different shapes, fonts and colors then sketched rough drafts on a piece of paper. Once we had a general idea of what we wanted, we opened up illustrator to make our logos come to life. Tools we used were the shape tool, a variety of fonts and different colors.

Friday, September 5, 2014
Why Color Matters!
When designing logos or advertisements for a company a huge aspect to the design is the color. Many companies choose the color to relate to what they're selling or organizing. Many restaurants that serve hot food will opt with a warm color like red, yellow or orange. Companies that work with the environment tend to use blue and greens.
Red- energy, love, health, anger
Green- balanced, growth, environment, envy
Blue- trust, peace, loyalty, technology
Black- hidden, mystery, spooky, unknown
White- pure, innocent, whole, perfection
Purple- imagination, creativity, immature, individual
Yellow- optimistic, cheerful, coward, intelligence
Orange- positive, enthusiastic, adventure, warm
Brown- friendly, serious, dirt, comfort
A good post I used to gather information is Understanding the Meanings of Color in Color Psychology
Monday, September 1, 2014
My Personality Type


When part of a team I tend to fill which ever role will help to accomplish our goal. I am able to step up and lead the group or am able to go along with other people's ideas. I still like to earn credit for which ever role I play though. Some people might misunderstand our need for harmony in the environment and wanting to be appreciated for what we do. Knowing that I am an extravert helps me understand why I struggle to understand introverts who don't like to be involved in school activities or parties. Also introverts may think I'm a little obnoxious because I'm very talkative and loud.
Tuesday, August 26, 2014
My Color Wheel

Subscribe to:
Comments (Atom)